I LOVE talking about blocks, studying blocks, and playing with them in Photoshop... I am always on a quest for great blocks and trying to figure out what makes them so great ... So I started this companion blog that will be devoted to this quest. But also check out my regular blog at http://olderrose.blogspot.com

Sunday, March 11, 2012

More gold from the Fool's Gold RR.
Flora in Washington state was doing this block for Kerry...  Kerry had specifically asked for a romantic look... 


The same time Flora  was doing  her bird in Washington, clear across the country Barbara was working on a gold bird for Maire.


And everyone was watching as Kerry worked on Wendy's block.  Wendy specified no color other than gold and wanted a peacock theme... The entire feather is chain stitch with gold thread.  I am getting this set next and have a design in mind already.

I love looking for gold I sent out in the packet and the tail on the peacock is a gold mesh ribbon I found in California...  I will want to use it also somewhere


I had request Jacobean flowers and color and this is the block Maire did for me.  I love the flower and the color....  I will be tempted though to outline the flower with gold cord when it comes home... just to set it off...


Finally Cathy L. did this block for Karen in Australia.  Cathy really got creative with her materials and the grape theme was really an ideal choice... You need to go to Cathy's blog to see how she did the leaves and butterfly.  The colors on this set of block is just so festive... I haven't seen Karen's booklet but I'm thinking it would be fun to do a dragon on one of her blocks...

In about 5 more days the first rotation will be over and the block will all be traveling.  I can't remember when I've enjoyed a RR so much...

Tuesday, March 6, 2012

Mini tut....converting photos to sepia tones

If you do not have a good editing program or timid about trying software as complex as Photoshop, take my advice and try Picasa

I have and use Image Composer and Photoshop but I still LOVE Google's Picasa because
1. It's free
2. It is so user friendly
3. It is extremely versatile...
4. It is so quick and easy.
5.  It does an amazing variety of things
6.   It's very low tech....
6. And I repeat ...it's free

Note: At this time there is still a similar program called Picnik which is also free.  It is also great but will be ending very soon.


Before you convert your COLOR  photos to sepia there is a very important step you need to do first.... convert them to black and white  THEN to sepia.. You'll be much happier with the results...

The following is an update of a post on this subject in March 2011:

I  accumulated several hundred pictures in my suffragette file.. and eventually it's time to get serious about printing them on fabric... First I need to do some editing and by far my favorite program for this procedure is Google's Picasa... As you can see in just these few there is great variation in color in my collection of photos....and I wanted them ALL to be sepia (brown) tones since there will be so many of them on the quilt.... Mine were all black and white to begin with so there was no need to convert them...
Picasa has an "effects" selection of choices and one of them is "sepia" so my first step was to apply that to all the photos I wanted to use...But even with all of them being sepia there was still more variation in tone than I wanted.
So the next step was to use the "saturation" selection.
Third down on the left....it is a choice I use on all photos, colored or not, which are to be printed on fabric... Color is always lost in that process so intensifying color in the beginning makes for a better end product. But in this case I'm using saturation to put many photos into balance. But as you can see the tools include sharpening, changing to B&W, tinting, adding a glow and soft focus among others... There are many other tools in the basic fixes and tuning sections.
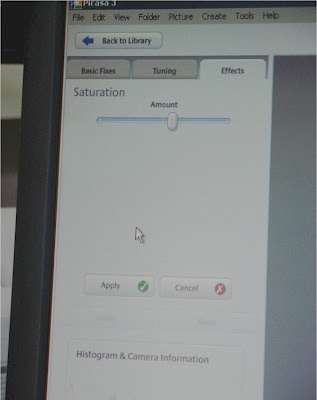
On most of the effects tools there is this simple bar and button.. You can slide the button either way and watch the change in your photo as you use it and before you hit the apply button... VERY low tech here...
So using this simple technique you can see how I was able to make my photos very even in tone... Not only easily but quickly.


Just as a follow up note... To get the pictures of the Picasa tools I actually took a picture of the computer screen as it was something that was not downloadable... I do this quite often but the last time I posted about it I received such a negative response from one follower that I was hesitant to confess again... Hopefully that follower has moved on...if not I already know how you feel on this subject..!!!

Friday, March 2, 2012

Goldwork shining through.

A good many of the first mailing of both goldwork groups are starting to show up on blogs and lists... and a wide variety of approaches are evident... I think the whole thing is new and I hope an exciting challenge to most in the both groups... There are too many to put in one blog so I will add them over the next few posts.  I had tried goldwork with Christmas trims a few years back and began to gather anything that was gold.

Arlene (also in Australia) is the most knowledgeable in the art as she actually took goldwork classes while in England..  On the left is her block for me... Her leaf is gold tulle edged with cording... 

I had asked for Jacobean flower which was not a favorite of hers... But quite often on such flowers each petal is a different pattern as hers are.  I was fascinated with the center which I believe is padded and a technique I see often in my goldwork books.  I am anxious to do it.  An area has a felt padding and is covering traditionally with gilded kid leather...  But I plan to cover the felt with other goodies from my stash...


She is definitely the goldwork bug expert and her beetles are to die for...  I am so tickled to have one on my block and I'm sure she will add them to any block if asked.  She even teaches an online class class on "beetle making" at Joggles.com.  This is on my "to try list" also...


I know Karen in Australia did a whole quilt with gold and called it "All That Glitters".  A flower made from gold ribbon is also on my "to try" list and she has one here.  One thing that wasn't on my list is a surface technique such as she did upper right..  It's on my list now as it reminds me of some of the goldwork from India I have seen on the Internet.


This is Janet's work for Flora... I received the blocks in today's mail.  In the photo I think the gold leaves tend to overpower the flower but NOT SO when you see it in person...  The flower is just stunning


It is gold netting which has gold sparkle in it and is edged with gold  chain stitch... The center is filled with gold beads...  I am anxious to start on one of  the blocks and will post about it on my other blog.

The Flora's fabric has a lot of black detail and Janet chose to finish all the seams with lovely black stitching combining her gold work with crazy quilting...

I will add some more blocks in my next posts... I am so delighted to see everyone experimenting with this.  I sent out bags of stuff from my stash and I am watching for it as the blocks emerge.