I LOVE talking about blocks, studying blocks, and playing with them in Photoshop... I am always on a quest for great blocks and trying to figure out what makes them so great ... So I started this companion blog that will be devoted to this quest. But also check out my regular blog at http://olderrose.blogspot.com

Monday, December 19, 2011

Framing with Pam Kellogg

I've started embellishing the frames I put around the images on my suffrage quilt.. will post about it on my other blog.  Any time you have an image on a piece of crazy quilting, it's a golden opportunity to add real pizazz and drama to your piece...  A good example is this lovely block by Pam Kellogg. When you see black patches in a block it is usually with a darker palette or jewel tones..  It is very seldom you see it with pastels as Pam has done here...  What makes the black work here???  The hat of course...  not only the color of the hat but the irregular shape of it...   Remember..."parts relating to parts and to the whole."

This is a wonderful piece of lace and Pam has used it to give a real WOW factor to this block...  It draws and holds your eye to the image  and practically caresses the photo... I love the flowers along her bosom and cascading into the block... You can see in this photo that using either all lace or all flowers would have overwhelmed the image.

When I started this blog I did a whole series of posts on framing images.... If you missed them you might want to give them a look.... http://blocktalkwithgerry.blogspot.com/search/label/frames

Sorry I've neglected this blog of late but it seems like I've barely touched the ground since Wichita and the next 3 weeks don't look much better... Plus doing the photo shop examples are very time consuming... But I will be back mid-January...  Happy Holidays everyone!

Wednesday, December 7, 2011

Response to comment!

Yesterday I received a comment that I am more than happy to respond to.....  "I have noticed in the past that you and many others talk about how elements should lead the eye around a block.....  But in this block you have placed the blue bird which is a fairly strong element flying right on out of the picture .... would you mind commenting on that please?"

Well when I placed this bird my eye was following the contour and the thrust of the bird which is upward.....not outward..


 In fact in my eye every element of this bird goes up ...not out.!!!


And so to me it was completing the path in the block.


To be flying right out of the block the bird needed to be tipped forward for the contour to aim it in that direction.   Note that the most important directional element of the bird is along the back...When placed side by side I hope you can see the difference... Of course Angela could tip the bird even further upward or place it closer to the rocks......

I am happy to answer questions at any time...

Sunday, December 4, 2011

Makeover for Ritva's Art Nouveau Block

I would have sworn I blogged about this block but for the life of me I couldn't find in on either blog... This block was from last year and when I ran across it in a file I was unhappy with the upper part...  I  asked Ritva to send it back and let me rework it and she graciously did.

I didn't like the foliage upper left and I don't know what processed me to have the bee flying off the block..  I found it very distracting... I also didn't like the bit of lace centered at the top...  So to me the whole top of the block was weak and wimpy and the elements didn't work well together at all.


I thought the fix would be simple...just add to the foliage and remove the bee and replace it with a directional bug.. But of course things didn't quite work as I planned... I had put the bee there with such vigor that I knew if I removed it there might be a scar on the fabric and so to be on the safe side I decided to leave it in place...


So I did redo the grass so it flows across the top to carry the eye... I still wanted a bug that was directional and added a dragonfly..  I kept it close to the bee so they worked as a single unit but larger to make the bee's direction less important...

So I am happy with the foliage and that the bit of lace is gone.. It would have been nicer if the bee could disappear but not happening....  Even with the bee, the top section is stronger and in balance with the rest of the block...

I love the hummingbird on this block...it was done on felt with lovely watercolor silk threads... When I added it to the block I stuffed it slightly with batting so it is very dimensional when you see it in person... So it will be popped in tomorrow's mail and off again to Ritva in Finland...  And my thanks again to her for returning it to me...

Sunday, November 20, 2011

Makeover for Kerry

On rare occasions a round robin will break down...Sometimes it is because what was chosen was too difficult for a participant, someone will get ill, someone has to quit or blocks get backed up and have to be moved on unfinished... But in this particular round robin I think ALL of the above happened..  Kerry Leslie and I were in this Beaded Round Robin together... I was third in the rotation to get her block after someone was ill and someone had quit...  This is the block when it arrived to me. It was pretty bare and what was even worse Kerry had expressed a wish for dragonflies on her block and there were only the two tiny ones.


Since there was only one person after me I had to make a BIG splash in a short time. I set about to make as many dragonflies as I could and do them all differently...  The big focal point is the dragonfly in the circle and the others pretty much blend into the patches... especially those lower left...  I did leave a little room for the last stitcher and hoped she add another dragonfly... but she didn't.

Over the years this block came up occasionally in email exchanges and at retreats and Kerry said she had always been meaning to renovate this block and make it truly a dragonfly block...  Since I had enjoyed doing all the dragonflies in the first place I had her send it along and set about remaking it....


Once I had cleared it of anything non-dragonfly it looked pretty much like this... At this point I decided to make another change also...  All the fabric were lovely and all were in the same value range except  the one lower right..  So I put it on my bulletin board and auditioned various alternatives...


After trying the several colors you see here I decided on a medium green..


So I added all the  beaded greenery and even more brass dragonfly charms which I painted with alcohol inks and I moved the original dragonfly charms to upper right...

There are dragonflies with lace wings, jewelry wings, metal filigree wings, organza wings to name a few and then I was left with the new green patch lower left  and Connie K. suggested putting a frog there and that just tickled my fancy..  So here is my whimsical frog on felt in frog heaven with all the dragonflies..


But as in the case with Janet's block I am leaving a decision for Kerry with this block...  At the end I was debating whether to remove the purple lace-winged dragonfly.  Here it is either way...

Wednesday, November 16, 2011

My Two Cents Worth for Flora

 Flora wrote:
 Not sure I'm done with this one yet.  I did finally post pictures of what I have been working  on my blog http://florasbeecrazyquilter.blogspot.com 
I'd love a little advice on what to do with that bare brown corner. I was thinking of putting a bird in a nest there to complementing the bird  button on the other side but I don't know!

  Gerry Help!

Oh my goodness Flora... you have one gorgeous block going here...  Your choice of image is delightful and so is the bird button... The combination of  the browns with the blues is really working and there's a lot of contrasts in texture and patterns in your fabrics.

I think the idea of a bird in a nest is a great idea because, as you mentioned,  it would complement the bird button.  But if you stuck it in the corner brown patch it would be corralled by that curved seam. and isolated from the block...  But if you perch the nest just above the patch on a branch..  it becomes a working element in the block and part of a path that moves your eye around the block...
Then you are still left with that brown patch and I'd recommend expanding your seam treatment right down into that patch to give it both texture and interest...  The last post I talked about scale and this could be a problem here....  You want to keep the bird on the nest larger than the button but smaller than the silkie... 

Remember my motto.... CQ is a pleasing arrangement of parts to their whole and to each other... Well as I looked at the block I am immediately drawn to the large beads upper right... At first I thought they were hearts but looking closer I think they are leaves... They don't relate to anything else on the block and overwhelm both the silkie and the block.  I would recommend removing them... Here is how it looks without them... right away the silkie gains importance which is why you chose it in the first place...
So what to do with that corner...?. well you need to look back into the block and you have lots to choose from... There is the oval laced collar on the lady and that shape in lace would be exquisite there...  Perhaps you could have a paisley or a fan overlapping the lace.  I notice that two of your patches have lovely paisley detail....why not use it as inspiration... One of my favorite things on this block is the incredible seam by the birds...  Those stitches and colors repeated would make an elegant fan that suits the block.. Anyway Flora whatever you do I want to see it when finished.... Okay?

And that's

Sunday, November 13, 2011

A little problem with scale......

While at the CO retreat I mentioned I wished I had joined the "For the Birds" RR when it came up as all the blocks were just great...  Connie just happened to have her last block available   and while I was working on it, Janet just happened to have her last block available... So I worked on Connie's and took Janet's home and it was the perfect size for something to work on in the plane to Wichita... I did the focal area around the bird going and all the seam work coming home...  I wanted the color to be concentrated around the bird which is the focal area...and that is why all the seam work is green...  I did stitch around the bird, then made a slit in the back and stuffed him a little to make him plump. Then I added a nice quiet little spider web near the center.

Last I wanted to add just a little more pink upper right to balance out the pink in the bottom patch and the pink flower...so I added a little lace dragonfly... and therein lies the problem of scale...  It is much too large.. almost as large as the bird and detracts from the bird.  The pink flower, the dragonfly and the bird are all about the same size and my eye hops from one to the other... When that happens the best thing is to make something smaller or bigger...  In this case the bird and the flower were predetermined by the block so it was only the dragonfly which could be changed.

I should have hand stitched a dragonfly and you can see the difference that would have made in the center photo...the bird again is the main focus. It  would even look better with no dragonfly rather than with the larger dragonfly on the left.... There is a point to this post and it has taken me a while to get to it...  Sometimes when you are not satisfied with a block it's not easy to identify why... Trust where your eye travels and why!  Often it is some small thing that makes a huge difference..and it is easy to change the wrong thing...  And most of the time if you don't change it, it is not long before you forget what bothered you.... so relax and enjoy!!!!!   On that note the  important dragonfly decision is going to be left to Janet.

..

Here are the before and after shots of the block....and as you can see I chose to extend the image out into the block....  Now next on my UFO list is Kerry's beaded block and it will be a block makeover to show you...I have just one corner to do on it but since it is beaded I have to work on it at home...  Then Ritva's and I will be caught up and can think about setting up the RRs...

Wednesday, November 2, 2011

My two cents worth for Sandi

Hi Gerry 
It's my turn to work on this block.  If you have time, what do you think I might do?  I thought perhaps an African Tree in the right corner over the lion?  Not much color in the block.  Maybe some large and bright bead work? It's a large block...16x16"
This poor block has been in circulation for over a year due to various reasons. It's owner has been ill  and I would like to have her block go home to her all decked out.  There is one more stop  before the block goes home.    Thank you!   Sandi M.    
Well I had some fun with this one as I've never done an African theme... The lion print is gorgeous and if you look closely, a previous stitcher has put stitching and beads on the foliage which is great...  Next to it is a fine spider web...

16"x16" is a very large block and this one is pretty much open for Sandi..So I decided we needed to think big and bold to fill it..  If it were my block to work on I'd use masks, lots of texture, lots of black, and geometric or linear seams ...lots of seam works in oranges, rusts and black... seams such as the ones on the left...

Look for trims with a linen or rustic look, some linen DMC thread, and not only glass beads but wood or clay ones as well.....and a few little bells.


Then get on Google images and type in "African masks" and they are so awesome and an endless source of inspiration...  My first thought was to stitch them on black felt and cut them out, but the more I thought about it, I decided I would paint them on a smooth black fabric such as poplin (backed with fusible interfacing before painting) and then cut them out, applique them on the block and embellish them.... And then add texture to them as hair, beads or as a neck ruff.   I especially loved the mask with bells...  I have a love affair with little bells . I have used them on many blocks.

I really liked Sandi's idea of the flat top tree you see silhouetted in so many photos.  I would start it right behind the lion and use it as a frame... What would be really fun is to layer black venice lace for the foliage.  How cool is that..?.

Just another very  little touch that I would like is to use the beige linen thread to highlight the grass by the lion and extend the grass into the next block..

Then once the masks are on,  the fun of embellishing them...  I chose the most colorful one to be the largest and the focal one and on it I would add layers and layers of bright beads as hair.  The other masks would have more subdued trim...

As you can see there is now a very strong path for the eye to travel.. and doesn't the leg and haunch of the lion make a wonderful directional element. I chose the position of the primary mask so it is in a direct line of sight of the lion... he knows they're out there...  Even though the black tree is a quiet area, it's heavily textured and there's a nice quiet area between the mask and the lion... and there is the spiderweb and stitching a the shrub there.. 
I did not add anything lower right as Sandi has to pass this block on... I would have probably added spears and a shield there... If you use lace for the tree top and paint the masks, it should all move along pretty quickly....


Now if you want even more eye candy and inspiration go over to Cathy Kizerian's blog as she has done an entire African quilt and has blogged about each block...  My favorite is the giraffe nibbling on leaves...


Now I am really taking a break to get ready and packed for Wichita.....and that's

Monday, October 31, 2011

From my list of the "Best of the Best"

 "Crazy Quilting = Harmony... a pleasing arrangement of parts to their whole and to each other..."

I am a self-taught crazy quilter and worked for years in isolation using books, but a whole new world opened up when I found CQI and the internet... By far I was most dazzled and inspired by Jo Newsham from NZ and sadly she no longer does any CQ at all...

It was her seam work that was most extraordinary.  She never fell into a habit of using a variation of a limited number of stitches..  All of her seams  were unique and I especially loved the ones that incorporated  ribbon work as you see here.  This DYOB block was part of  Fab Fans RR. 

Do click on it to enlarge and study the detail.

Most everyone, and especially myself, used conventional fans but not Jo.. Hers were all very creative and not a machine-made lace fan motif to be seen.. 

Most noteable was the focal fan of this block... a paddle fan..   She could have used just a piece of lace with a handle but she took it a step further by putting a circle offset in a circle... much more interesting. Doing it white on the light center patch makes it stand out on the block while the darker work on the darker lower right patch recedes and makes a perfect balance

This was the other piece of Jo's I had in my collection of great blocks...  But first I must share that Jo is color blind. To compensate she most often stuck to a very limited color palette or a monochromatic selection of threads and fabrics.  These techniques defined her style and should be a great inspiration to anyone struggling with color theory. . You can see here she chose only lavender and soft green.. This limited palette gave her work a  simplicity that ensured all the parts of the needlework would complement each other.


My favorite on this block is the elaborate seam running diagonally up the block.  It is  a seam treatment but is much more as it creates the path that takes your eye around this block... It is so creative.  Look closely at it and don't overlook the little white needlewoven leaves. There is so much movement in this short section of thread, beads and buttons that it almost seems alive.


And of course her  ribbon embroidery work is second to none... Please take note also that there are very few "doodads" on Jo's work...it is all about needlework and superb needlework at that.

As I mentioned she doesn't do any CQ work anymore but much of her work is still archived on her blog under "round robins" label and you can also see what she is doing now...   I often think her tidbits of sage advice and wicked humor... I do miss her.

Saturday, October 29, 2011

Why can a RR block go wrong and does it matter anyway!!!!

This post is in response to an email I received yesterday... Not every block goes out and returns the block of your dreams... and here are some of the reasons why..

What the block owner has written in the booklet is too little and too vague...  She has forgotten to mention she hates orange, anything plastic and abhors any spiders on anything....  Her team (I always like to think of us as working together as a team) immediately feels adrift on the block and would love a little more direction... It would have been more helpful if she had added she loves lace, roses and all butterflies..
I have been guilty of being too vague and when the block comes back and I'm not happy with it I have myself to blame... If you are in this situation why not ask the owner a few questions?

What the block owner has written in the booklet is too specific and restrictive...  I have been guilty of this also.  Once I asked for colors to be limited to what was in the fabric...  And everyone did that and what a boring bunch of blocks that was...  If you are in this situation, toss your ideas out... Could be the block creator will love it..

Also by being too restrictive you may be putting out demands unable to be met by someone on your team... someone who may be unsure of bullion roses or expanded seams for example and if that is all you want than you might be disappointed and the team member will be frustrated.  Be flexible.

Also by being too restrictive you might be stifling some creative additions...  Encourage people on your team to contact you if they want to do something other than you asked and be open minded.  I have a a favorite block of mine that is a perfect example...

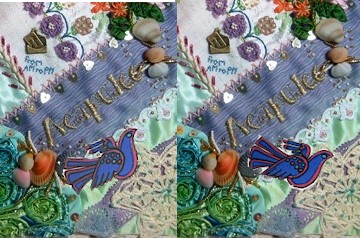
This block went out and Leslie did all the whimsical lace and bead work by the silkie and added a cluster of buttons above the silkie...  Then the block went to Ati who wanted to put a cluster of roses above the roses and move the buttons elsewhere.


Ati wrote to me as block owner AND to Leslie as the previous stitcher about her thoughts and we both told her go for it...and she did.

But as is the case in EVERY RR,  the block is never complete until it is home and the block owner has her go at it...  In this case I decided I didn't want a trail of buttons and wanted a trail of hearts instead.  So the all the buttons (except the big red one) went into my button box and I added my trail of hearts.  Obviously the point being is communication and the exchange of ideas..but the owner has the last say about everything on the block....


But sometimes things go awry because not everyone can work as a team...  The block arrives home out of sync the owner has every right to move, change, or edit the block to her satisfaction...and indeed she should because we don't want blocks languishing in drawers unloved...  Sometimes the creator of a block sees it in an entirely different light when it arrives home.... There are very, very few blocks that have arrived home to me that I have not modified..  Team members should not be offended in anyway... They did their part and the block moved on.. 

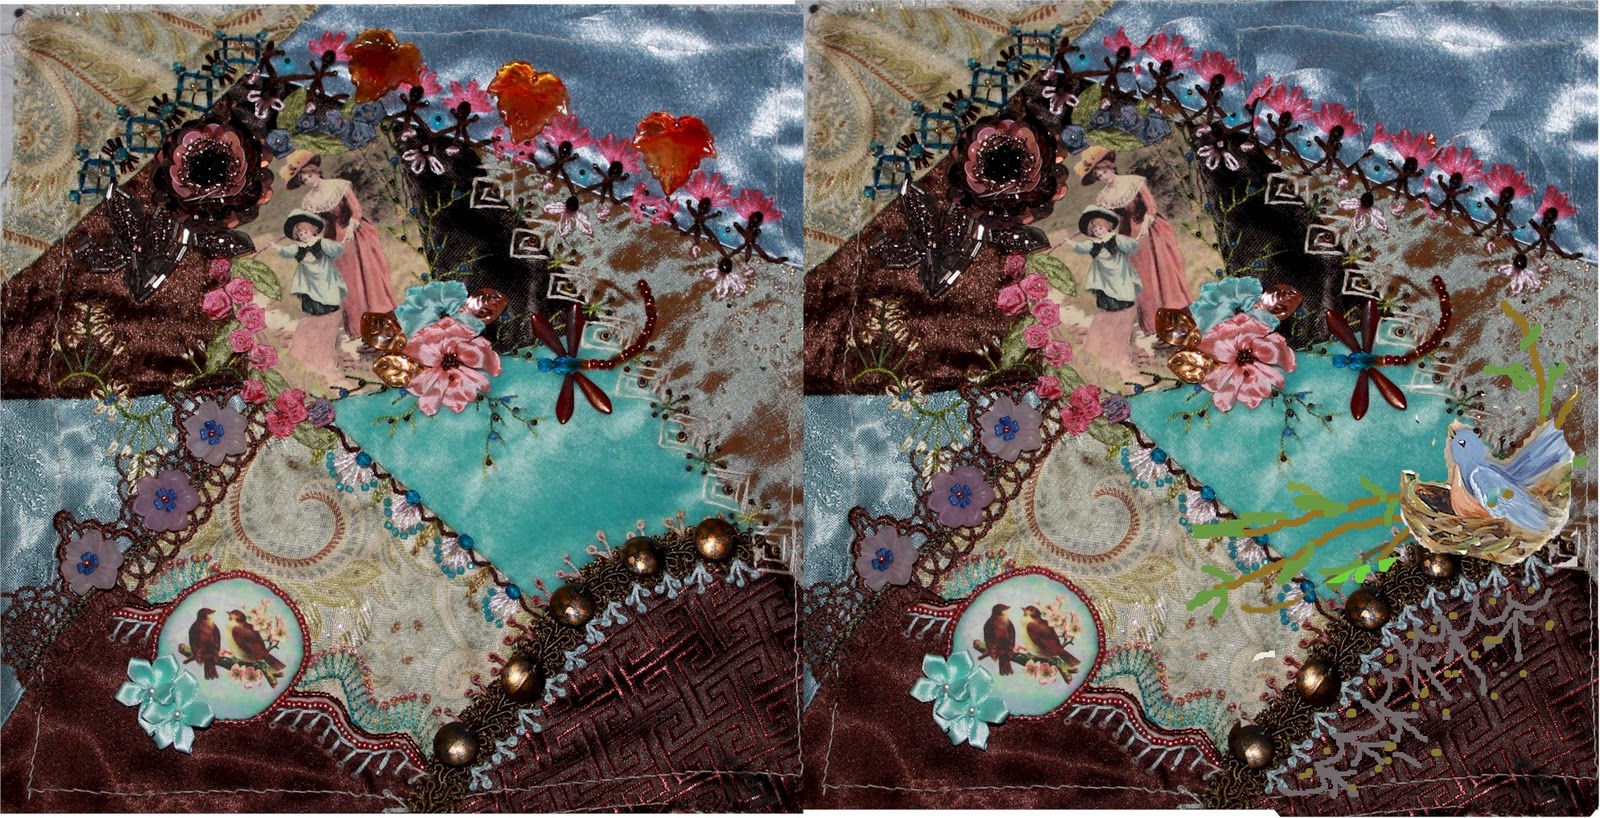
As I have said many times before what really matters is NOT the block but everyone being challenged, learning along the way and making friends..... You cannot grow in a vacuum and working with others is always stimulating.   I've been reworking an old RR block for Kerry (beaded dragonflies)  and one corner just wasn't speaking to me. At the retreat someone walked by, leaned over my shoulder and whispered "You should put put a frog there!"  I could have jumped up and hugged her.  I would have sat there forever and NEVER thought of that... I can hardly wait and what an impish frog it will be!!!!

Thursday, October 27, 2011

Let's Talk Block

In Sharon Boggon's class last April she felt the key to what makes a successful block was contrast and we discussed it at length.  I had to think about that for a very long time and while contrast is vitally important, there is one more thing more important in my opinion....  "Harmony... a pleasing arrangement of parts to their whole and to each other..." After searching through the many blocks this summer I am even more convinced of this and you will hear it often from me and this block by Sharon Boggon is a perfect example.  Here are some of the reasons I chose it to be among the best of the best...
Look at all the parts of this block and how they relate to each other and how they combine to one complete whole... Nothing stands alone in this block... Every part is unique but complements every other part...


 Now about these parts!  The first thing that attracted my eye was the fabulous seam treatment upper left.. It alone is a work of art... Basically it is quite simple... chain scallops with stacked sequins and beads but the colors echo every single color in the block.. This simple seam adds immeasurably to this block.  Look at the block without it... The block feels incomplete without it... If you ever had any doubts about the importance of seams and what you can achieve with them...here it is..

Next is the rich surface texture of the flowers.  It also incorporates all the block's colors but for me the drama is in the size of it.  It anchors the block and frames the silkie.. It wouldn't be nearly as stunning if it were any smaller...


And of course there are all the  elements placed strategically  for your eye move smoothly around the block...


And finally one of the least  talked about design elements  in crazy quilting...quiet spots for the eye to pause.  There are three kinds in this block..  First is upper right.. It is not just a patch with a button stuck in the middle...  The buttons are complements to the seam but the patch is small but quiet.  The second  quiet spot is lower left..  Even though it is heavily embellished with a lace motif and beads, the dark color recedes and does not draw your eye at all...  The third and loveliest is the pink patch that is unembellished except for the seams..  The upper left seams and the flower treatment would all mesh together if it were not for that quiet pink patch between them... There is also the quiet but gorgeous beaded diagonal seam  lower left...  Lesson.... Not every thing has to stand up and shout to be an important part of the design of a block.

Saturday, October 22, 2011

My Two Cents Worth for Wendy

"Hi Gerry,
I am sending a pic of my Gypsy Treasure RR block......I would like for you to  give me some ideas on it.....one thing I know I want to change is the white lace as to me it does not belong. Also should I remove the silkie and start over with something different? This block really needs some help and I am stumped as what to do with it.....my favorite thing on the block is the gypsy torso that Lauri made for me......I really appreciate your looking at this for me....feel free to use it on your blog if you would like to."

So I emailed Wendy right away and told her  she could take that silkie off but don't touch the white lace...  The lonely little buttons could go also...

She's right about the gypsy girl Lauri did and it deserves a fantastic block...  The first thing this block has going for it is all the lovely seam work... But since we're going over the top with this I'd go in and give all those seams another pass or two and LOAD them up with sequins and beads... how appropriate for a gypsy girl....bling, bling and more bling...

I wanted Wendy to leave the white lace because if she removed it there would be that white patch all by itself...  AND it's the white patch that I'll address first...  Find a wide blue ribbon and a narrower pink one  and a fancy braid and run them down the center of the white patch until the white left showing echos the width of the white lace..... clever yeah?

Now the white lace seam is a long one so break it up with some bright, fabulous embroidered flowers in abundance..... And how about a tambourine replete with colorful ribbons...  I have made them using leather from an old glove covering some card stock... Of course a trip to Michaels or Joanns to find a cabochon suitable for a crystal ball and a palm for fortune telling.... then finish it off with some old coins...

Are those enough ideas?  I want to see this when you finish Wendy....


And that's my
I'll be taking a break from blogging while I'm preparing for the Victorian Stitching Retreat in Wichita where I finally get  to meet Carole Samples....

Friday, October 21, 2011

My Two Cents Worth for Angela.....

"Hi Gerry.

I look forward to each of your block talk posts and thought I'd take a shot to see if you might evaluate my block for your blog. I took part in Nicki Lee's HGTV CQ Challenge.I fell in love with the swirly focus fabric that was provided as well as the ribbons and charms we were given to use. I suspect that the floral spray in the upper right could use some more work.

I tried to extend the green to the left after taking a step back from it, but I'm going to dig through my stuff and see if I don't have any of the original green ribbon left, because I'm not sure the embroidery really worked. 

I'd love any feedback you have!"

Well I emailed Angela right away and told her that I also loved the swirly fabric and don't bother looking for the green ribbon as that part all contributed to the tropical theme of the block....Acapulco!!! 

The real problem in my opinion (and we know I have one..) is the whole patch upper left,..  With all the lines it has a very strong impact and since it occupies as much or more visual space than the lovely swirly fabric, it overpowers the block...  It doesn't relate to the tropics theme or to anything else on the block... 

Once you look at that patch your eye continually keeps going back to it... Can you see when it is blocked out how all of a sudden what is left is working... So it has to go and since Angela has lace lower right I   covered  upper left with lace with a little help from photoshop.

If even nothing else but the lace is added, the block is gorgeous.... But I wanted to go a step further..  I have to admit that I've never been to Acapulco so I went to good old Google and started looking at posters and pottery from Acapulco.


Of course I found a lot of palm trees but I immediately was drawn to the plate in the middle as the flowers looked like the flowers on Angela's block.  But I loved the little bird also and saw these blue stylized birds on lots of pottery plates and mugs.

So I added some palm trees to the upper left... bending in to bring the eye around... and a little blue bird of happiness at the bottom right... Remember when I said I loved the quiet space by the image in Wilma's block...?  Look here is one again next to the heart...  Need those quiet spots....  Now for a lounge chair and something fruity and frosty to drink... 


Sometime taking something OUT makes all the difference..... and that's